Administrator’s Guide to Presbyters Training
WP Community Presbyters Core v1.2.0
A complete guide for Training Administrators managing the Minister Training System
Table of Contents
- Introduction
- Getting Started
- User Roles & Permissions
- Managing Courses
- Creating Lessons
- Building Assessments
- Monitoring Students
- Reports & Analytics
- Certificates
- Settings & Configuration
- Troubleshooting
Introduction
The Presbyters Training System is designed to help you manage minister training for your church community. This guide covers everything you need to know as a Training Administrator.
What You Can Do
As a Training Administrator, you can:
- Create and manage training courses across 5 volumes
- Build lessons with rich content
- Design assessments with multiple question types
- Monitor student progress and completion rates
- Generate reports and export data
- Issue and manage certificates
What’s Pre-Loaded
When the plugin is activated, it includes a complete curriculum:
- 64 Courses across all 5 Training Volumes
- 46+ Lessons with full content
- 10 Assessments with questions
- 40+ Quiz Questions ready for students
Getting Started
Accessing the Admin Panel
- Log in to WordPress with your administrator or Training Administrator account
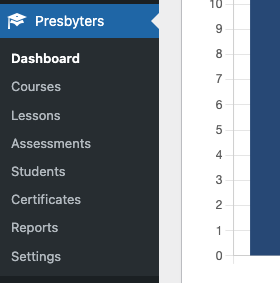
- Look for Presbyters Training in the left sidebar menu
- You’ll see these submenus:
- Dashboard – Overview statistics
- Courses – Manage courses
- Lessons – Create lesson content
- Assessments – Build quizzes and tests
- Students – View student progress
- Certificates – Manage certificates
- Reports – Analytics and exports
- Settings – Configure options
Quick Start Checklist
- ☐ Verify your account has the Training Administrator role
- ☐ Review the pre-loaded courses and lessons
- ☐ Create or verify the Courses page exists with the shortcode
- ☐ Assign the Presbyter Student role to students
- ☐ Review the Settings page for configuration options
User Roles & Permissions
Understanding Roles
The plugin uses two custom roles:
| Role | Who Gets It | What They Can Do |
|---|---|---|
| Training Administrator | Course managers, teachers | Full access to manage courses, lessons, assessments, and view reports |
| Presbyter Student | Students enrolled in training | Access courses, take lessons, complete assessments |
Assigning Roles
Important: WordPress only allows one role per user in the default user editor. To assign the Training Administrator or Presbyter Student role while preserving a user’s existing roles, use the WP Community Core plugin.
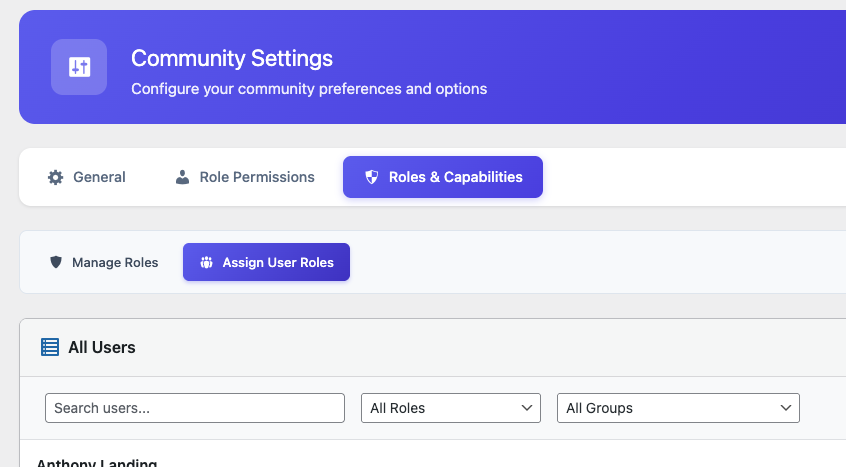
To assign roles (Training Administrator or Presbyter Student):
- Go to WP Community Core → Settings
- Click the Roles & Capabilities tab
- Click the Assign User Roles tab
- Find the user you want to modify
- Select the appropriate role:
- Training Administrator – For course managers and teachers
- Presbyter Student – For students enrolling in training
- Click Save Changes
Important Notes
- Training Administrators do NOT need to be WordPress Administrators
- Regular Subscribers cannot access training content
- You can have multiple Training Administrators
Managing Courses
The 5 Training Volumes
Courses are organized into volumes based on Elder Mark Everet Jones’ curriculum:
| Volume | Color | Content Focus |
|---|---|---|
| 1 | 🔵 Blue | Apostolic Doctrine & Theology |
| 2 | 🟢 Green | Christian Living & Ethics |
| 3 | 🟤 Brown | Religious Education & Sunday School |
| 4 | 🟣 Purple | Apostolic Emphasis Quarterly Themes |
| 5 | 🟠 Orange | Practical Ministry |
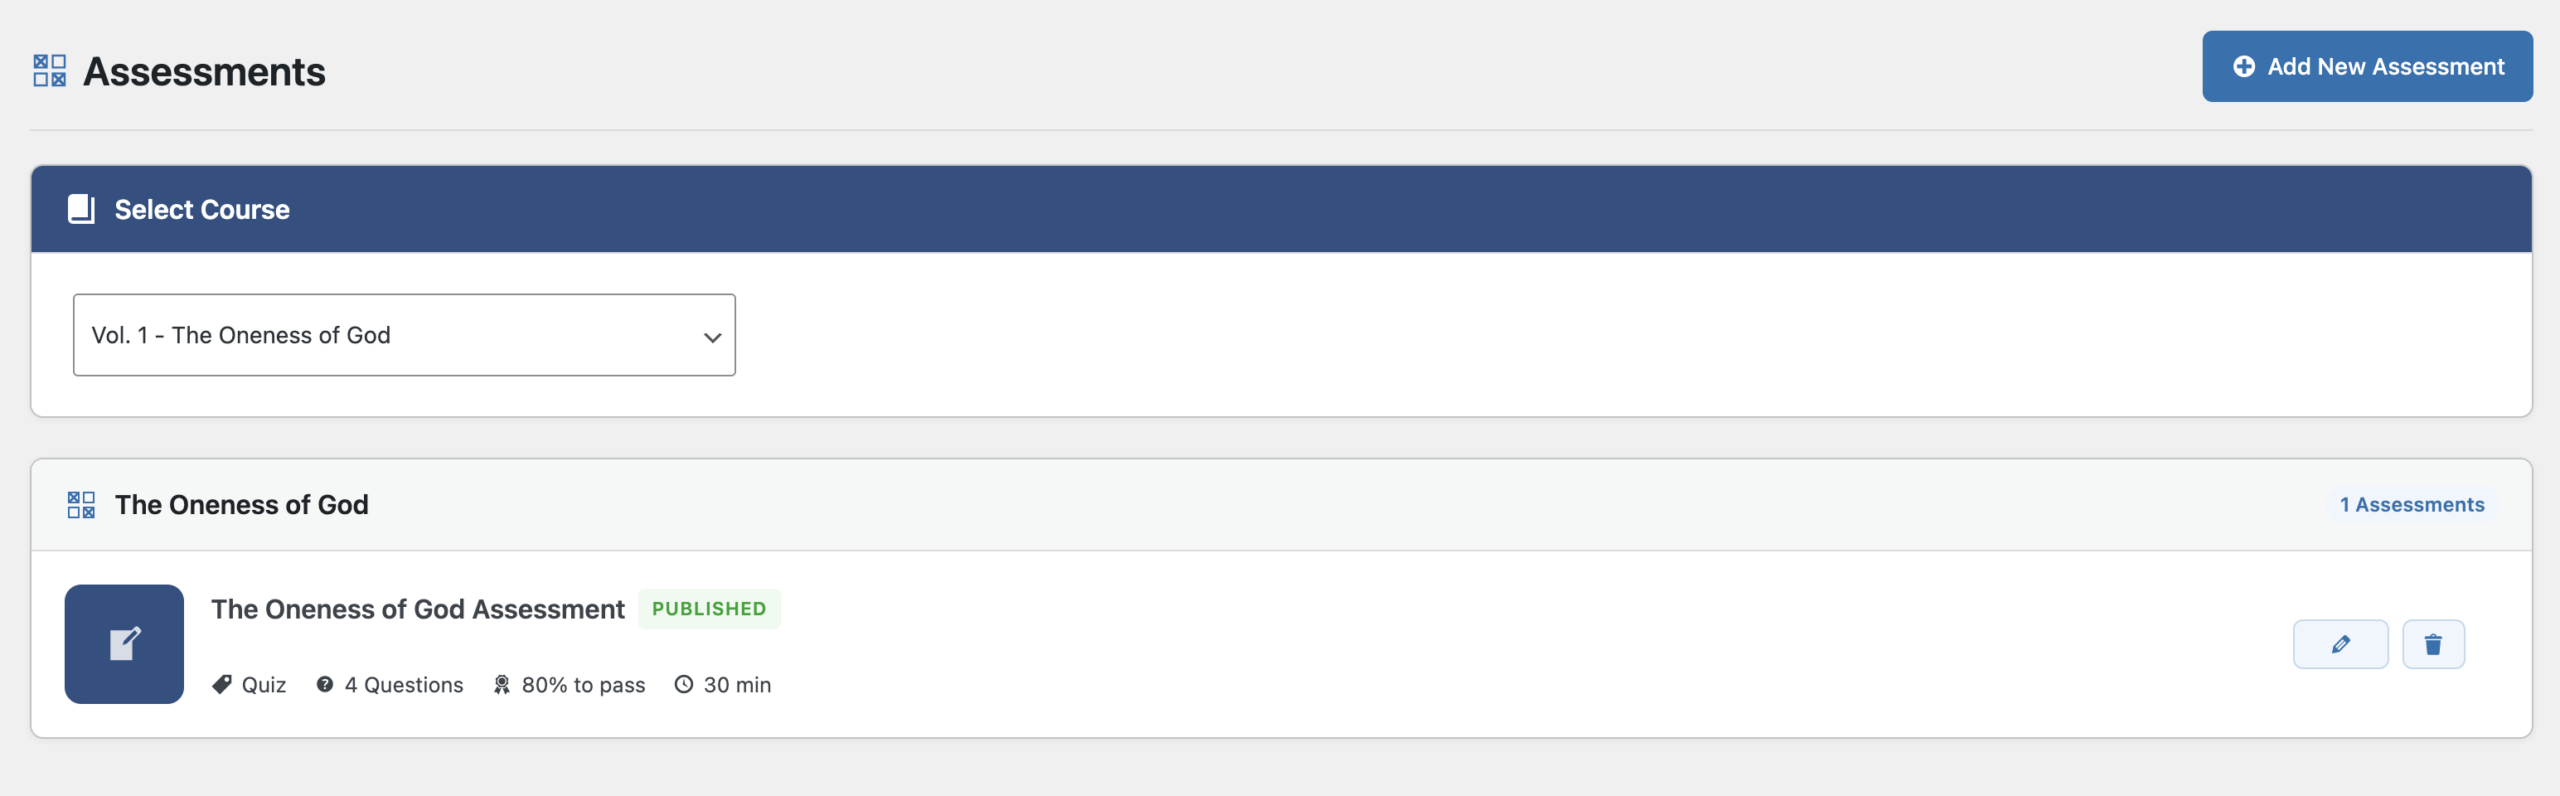
Viewing Courses
- Go to Presbyters Training → Courses
- See all courses listed with:
- Title and description
- Volume number and color
- Lesson count
- Student enrollment count
- Status (Published/Draft)

Creating a New Course
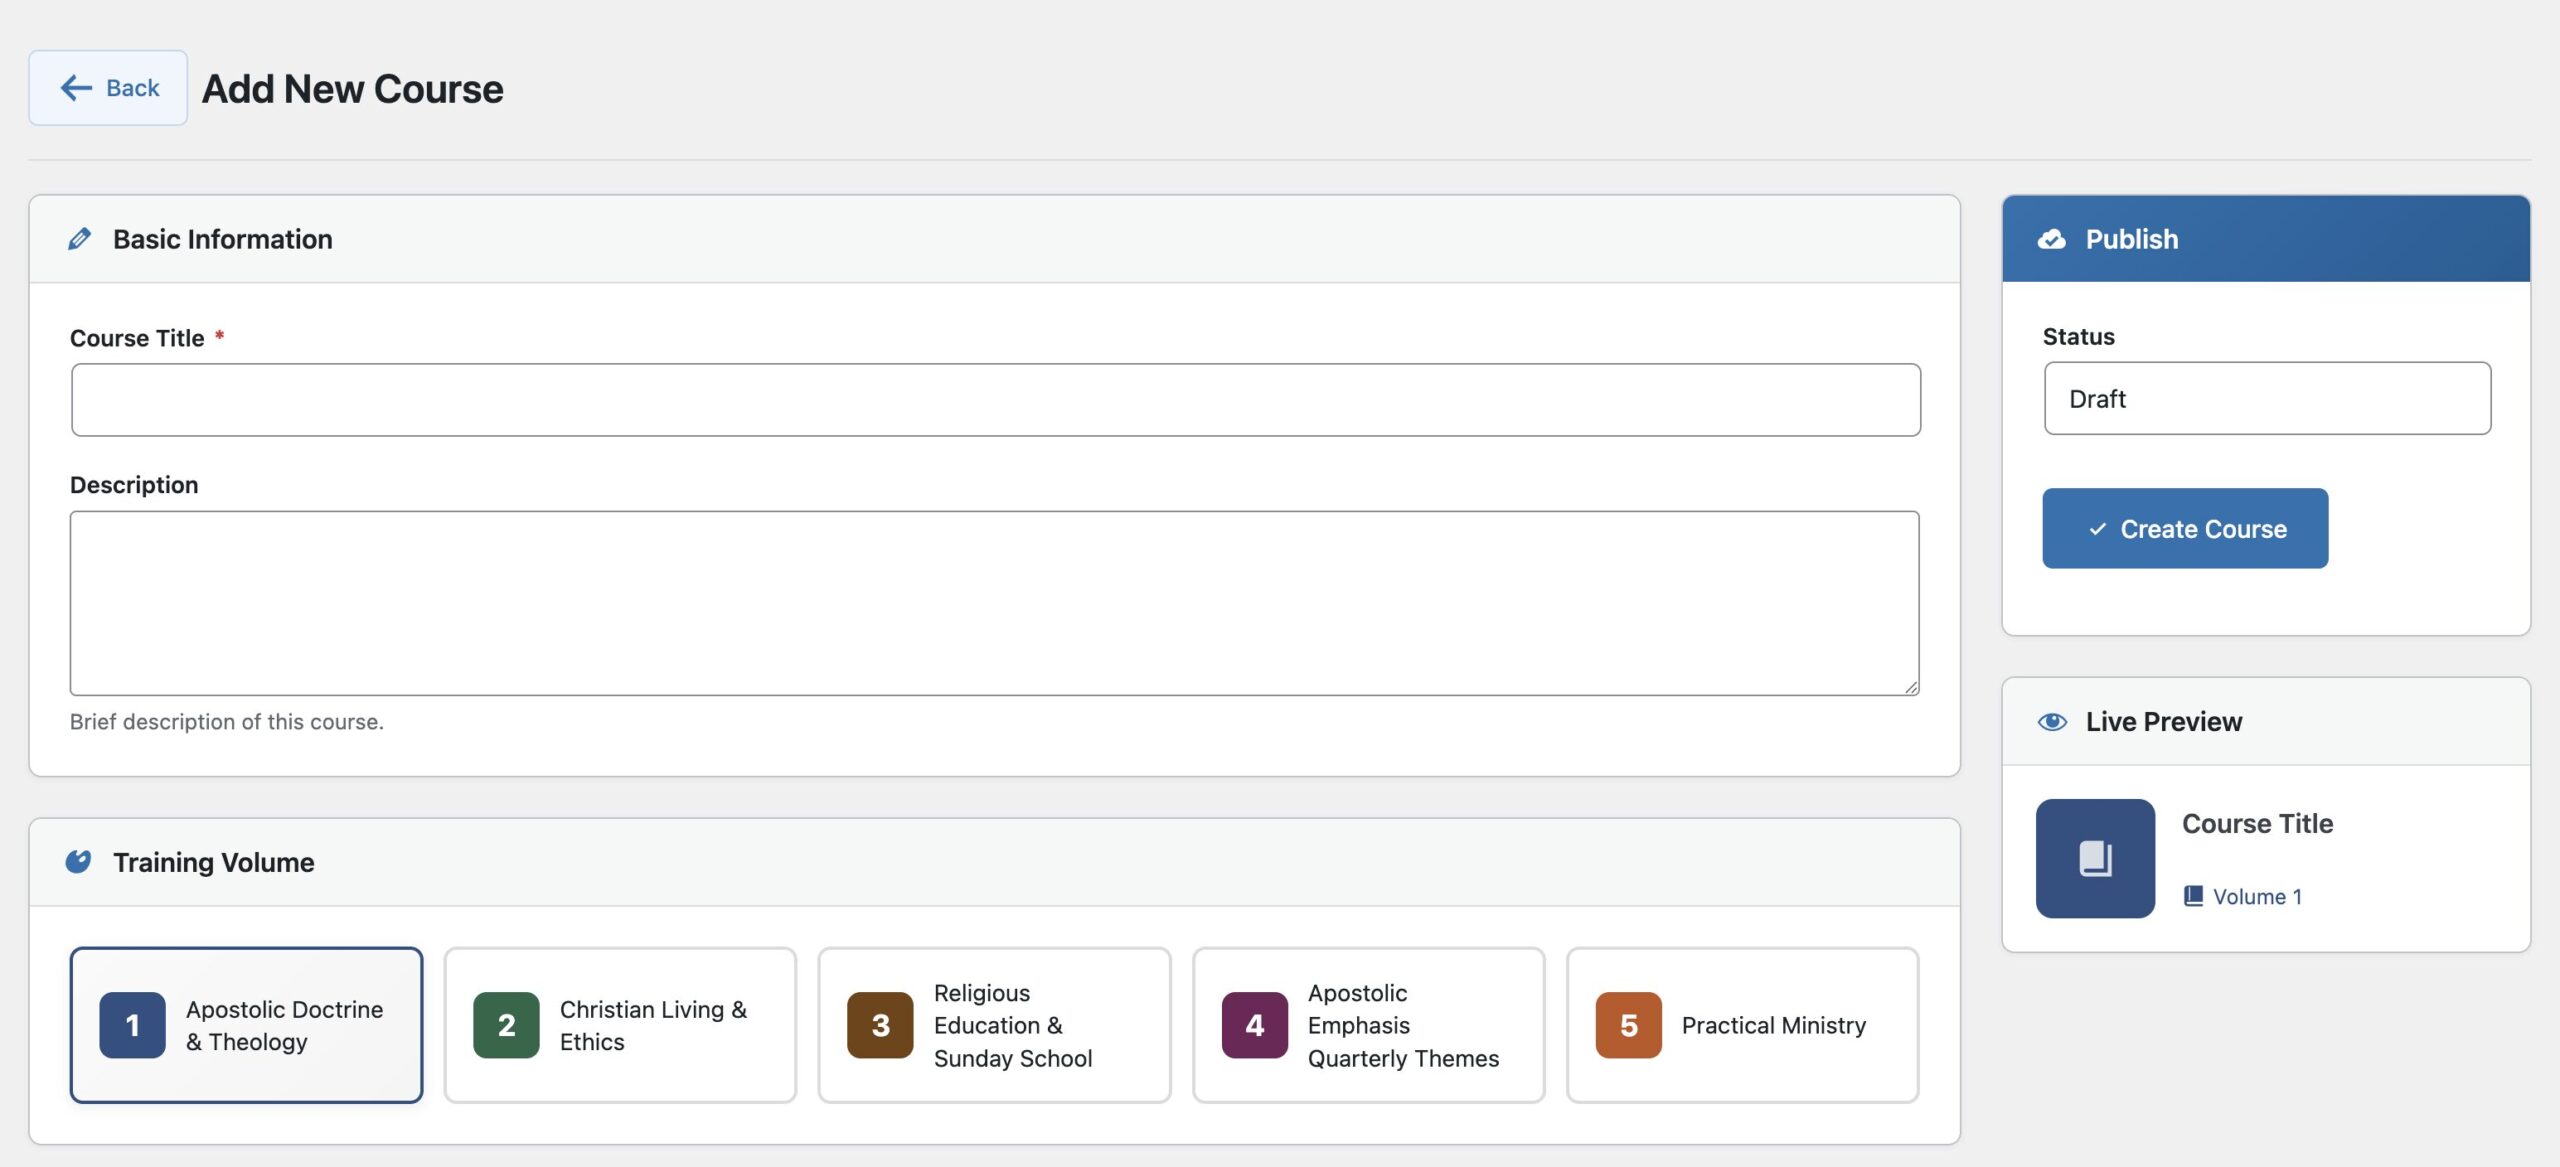
- Click Add New Course
- Fill in the form:
- Title: Course name (e.g., “Introduction to Apostolic Doctrine”)
- Description: What students will learn
- Volume: Select 1-5
- Color: Optional custom color (defaults to volume color)
- Order: Position within the volume
- Status: Draft (hidden) or Published (visible)
- Click Save Course
Editing Courses
- Find the course in the list
- Click the course title or the Edit button
- Make your changes
- Click Save Course
Course Best Practices
- Keep titles concise but descriptive
- Write descriptions that explain learning outcomes
- Group related courses in the same volume
- Use Draft status while building content
Creating Lessons
Adding Lessons to a Course
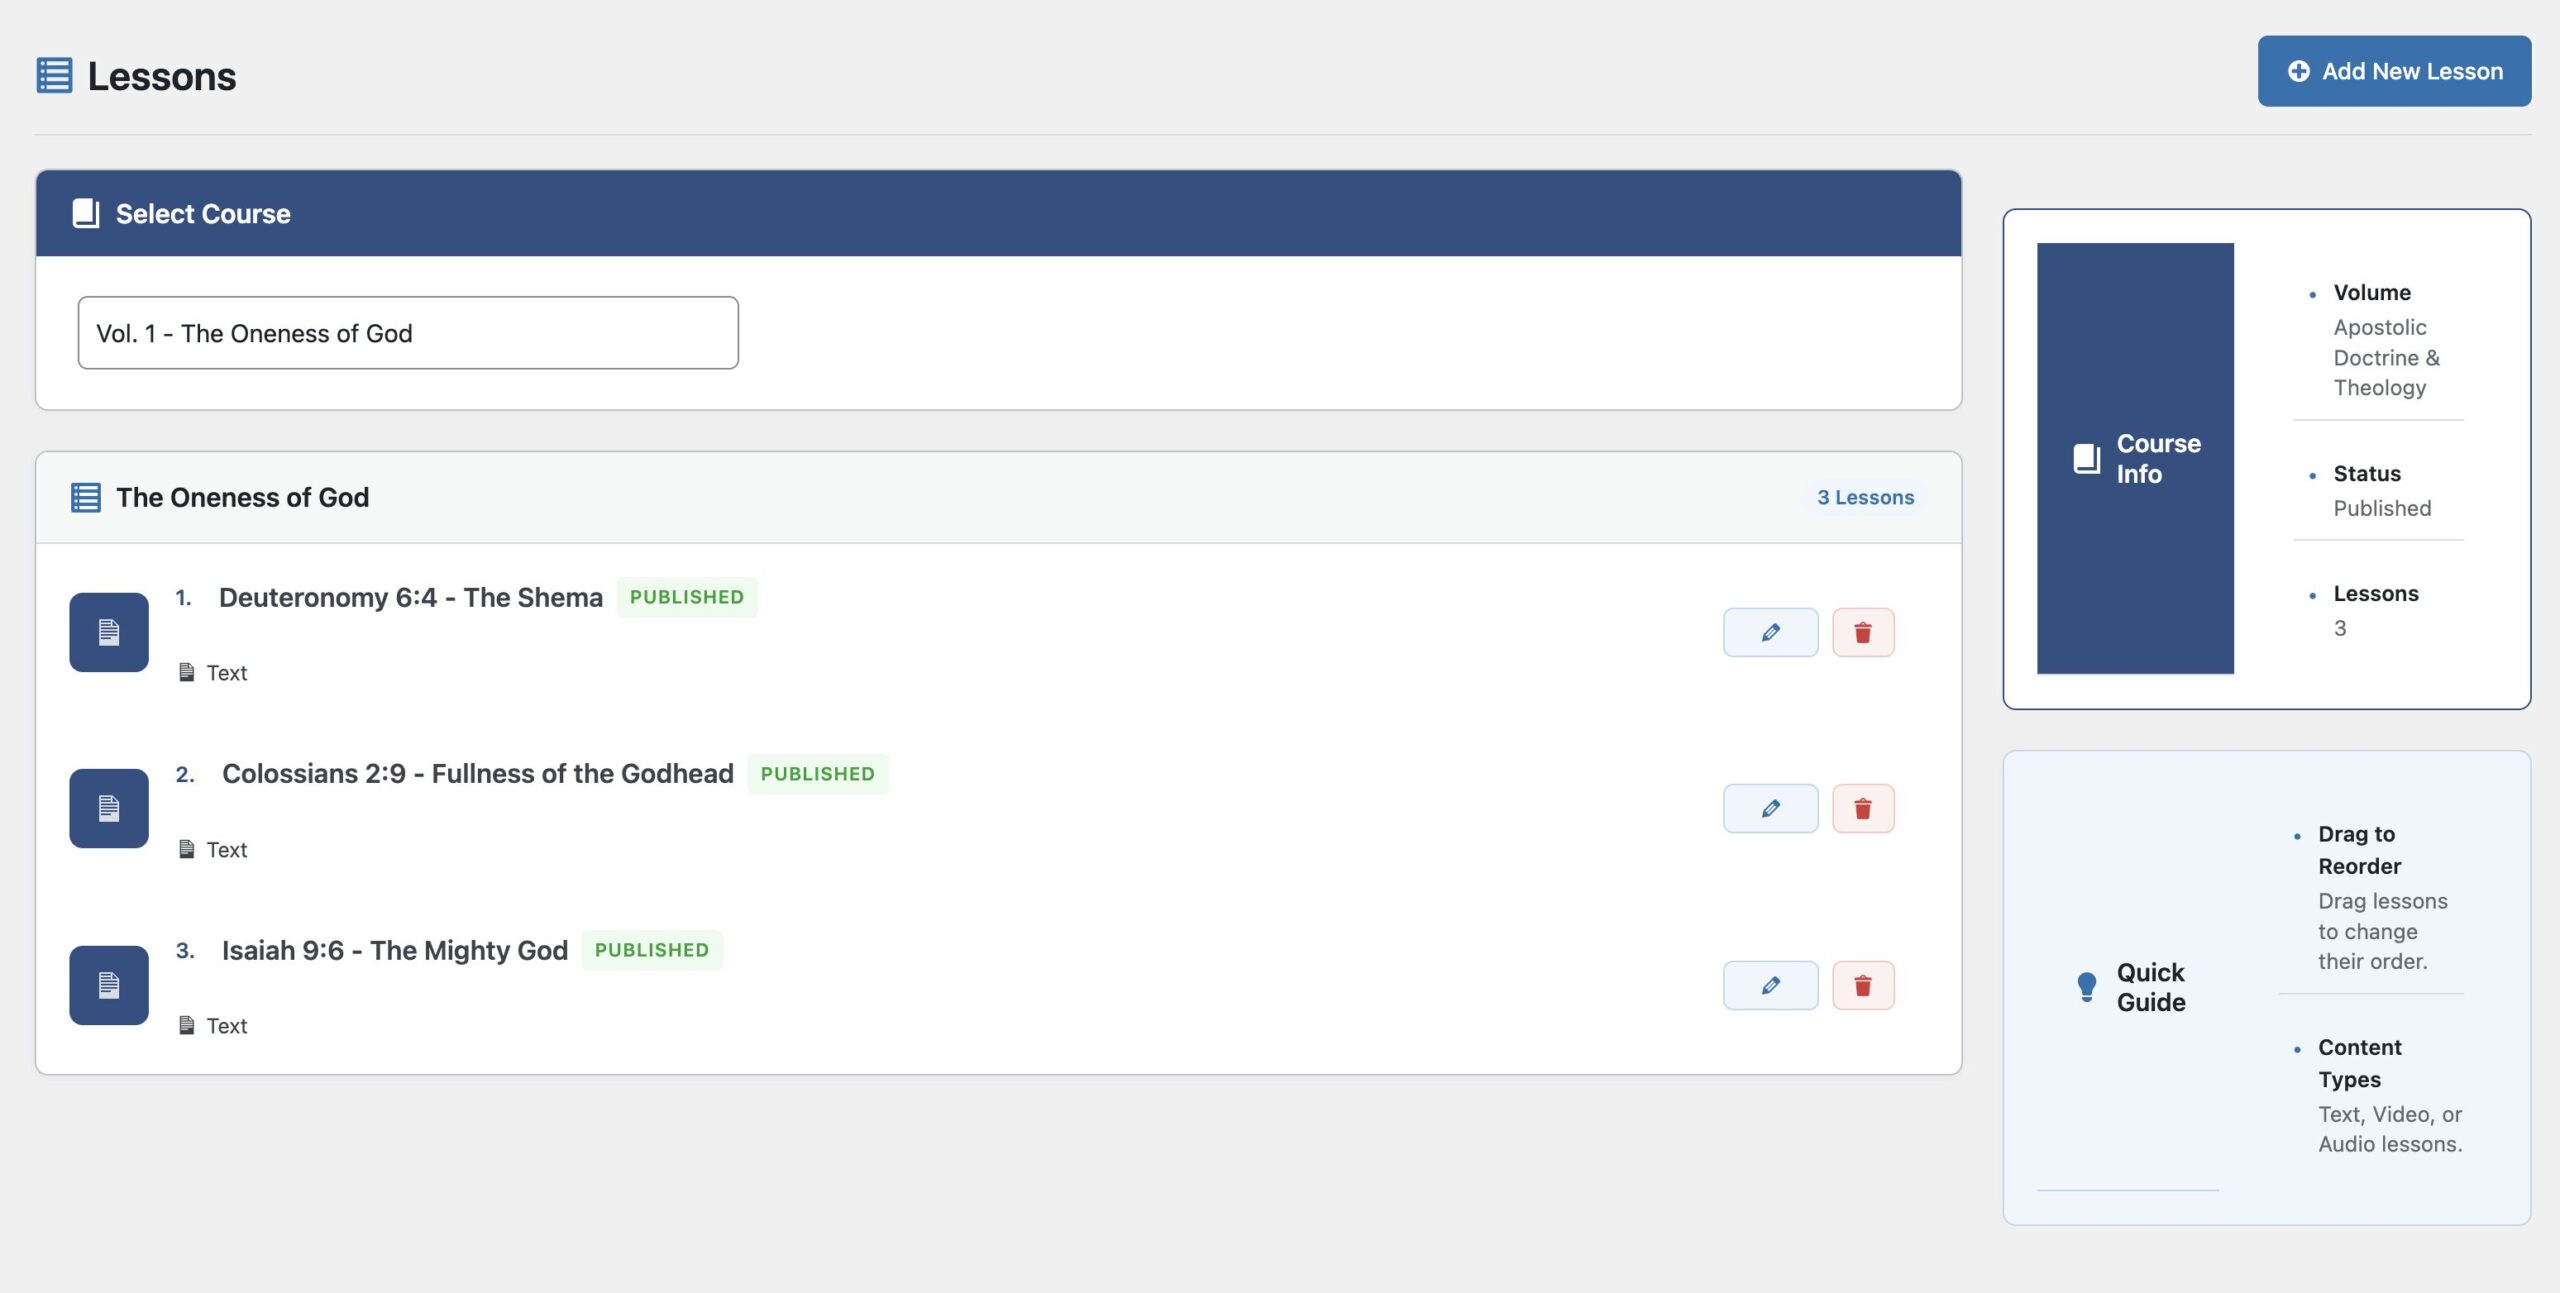
- Go to Presbyters Training → Lessons
- Select a course from the dropdown
- Click Add New Lesson
- Fill in:
- Title: Lesson name
- Content: Use the rich text editor
- Order: Position within the course
- Status: Draft or Published
- Click Save Lesson
Lesson Content Tips
You can include:
- Text with headings, paragraphs, lists
- Scripture references – Format as quotes
- Embedded videos – Paste YouTube/Vimeo URLs
- Images – Upload or link to media
- Key points – Use bold or highlight boxes
Reordering Lessons
- View the lesson list for a course
- Drag and drop lessons to reorder
- Changes save automatically
Lesson Status
- Draft: Only administrators can see it
- Published: Students can access it
Building Assessments
Assessment Types
| Type | Best For | Feedback |
|---|---|---|
| Practice Quiz | Learning reinforcement | Shows correct answer immediately after each question |
| Official Test | Graded evaluation | Shows all results only after submission |
Creating an Assessment
- Go to Presbyters Training → Assessments
- Select a course
- Click Add New Assessment
- Configure settings:
- Title: Assessment name
- Type: Practice or Official
- Time Limit: Minutes (0 = unlimited)
- Passing Score: Percentage needed to pass (e.g., 70)
- Click Save Assessment
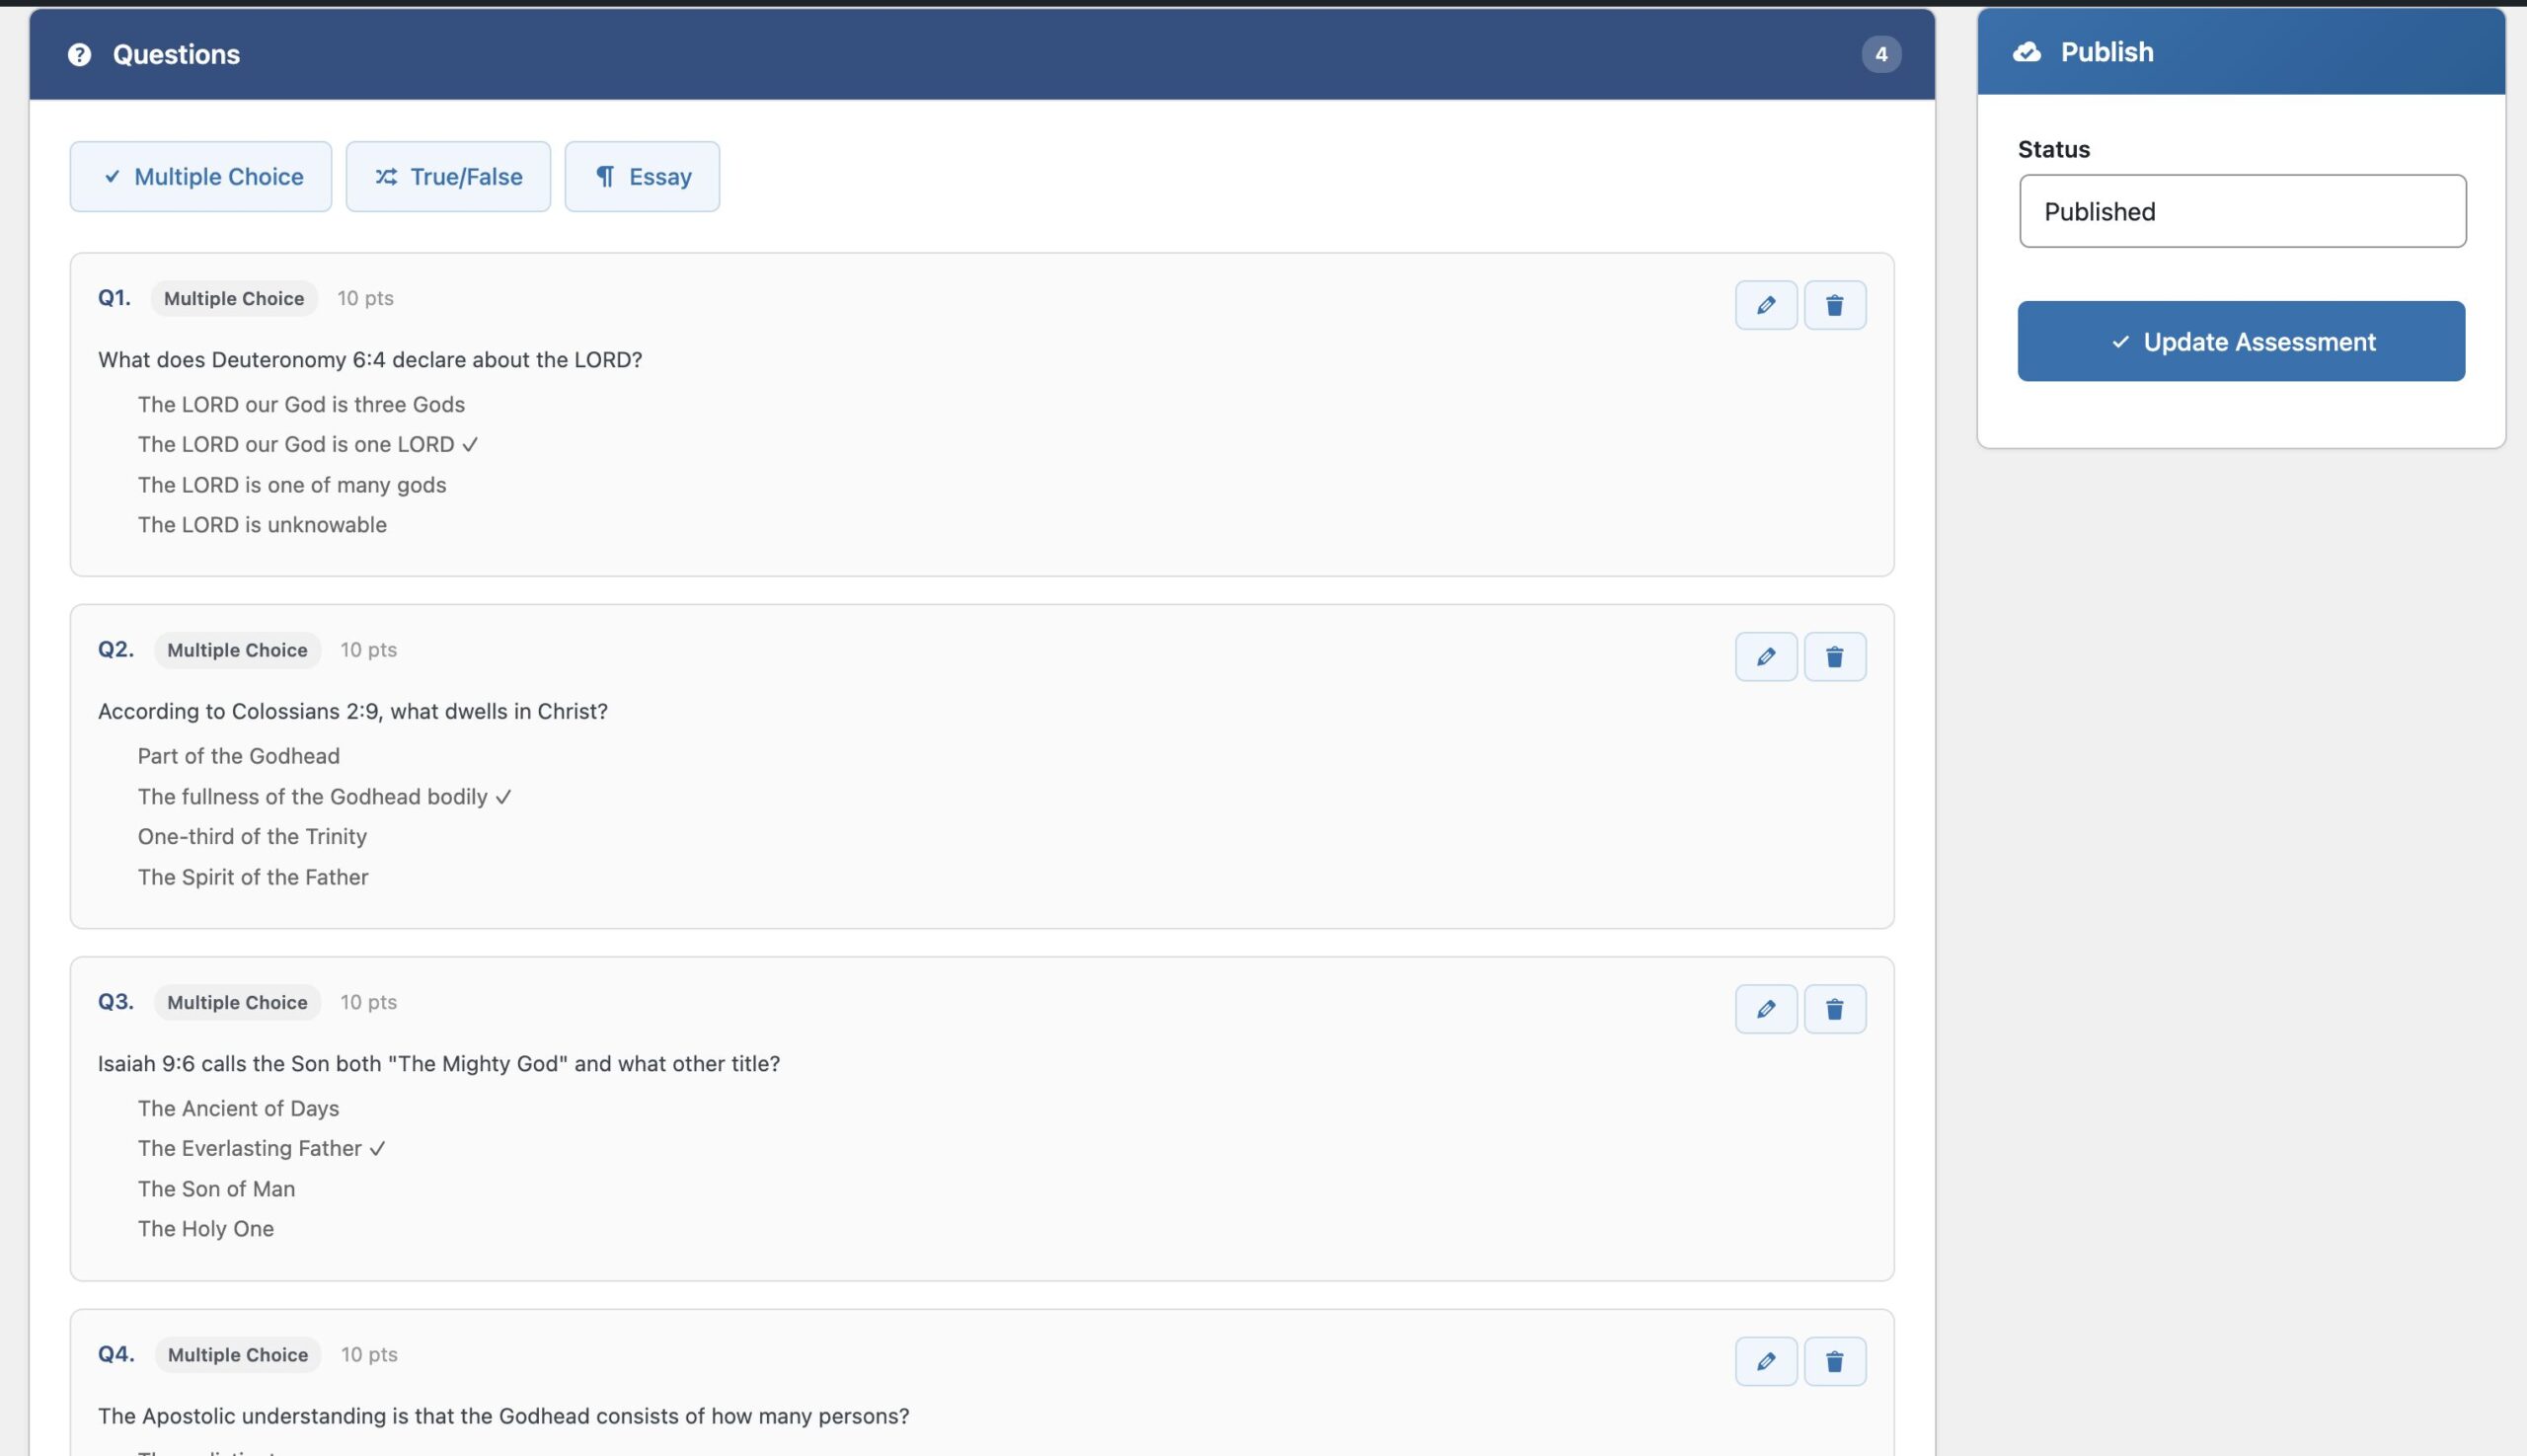
Adding Questions
After creating the assessment:
- Click Manage Questions
- Click Add Question
- Choose question type:
Multiple Choice:
- Enter the question text
- Add 2-5 answer options
- Select the correct answer
- Set point value
True/False:
- Enter a statement
- Select True or False as correct
- Set point value
Essay:
- Enter the question prompt
- Essays require manual grading
- Click Save Question
- Repeat for additional questions
Question Tips
- Write clear, unambiguous questions
- Avoid “trick” questions
- Make wrong answers plausible but clearly incorrect
- Use a mix of difficulty levels
- Test the assessment yourself before publishing
Monitoring Students
Students Dashboard
- Go to Presbyters Training → Students
- View the student list with:
- Name and email
- Courses started
- Courses completed
- Average progress
- Last activity date

Filtering and Searching
- Use the search box to find specific students
- Sort by clicking column headers
- Filter by course or completion status
Exporting Student Data
- Click Export CSV
- Download opens automatically
- Open in Excel or Google Sheets for analysis
Understanding Progress Metrics
- Courses Started: Student has viewed at least one lesson
- Courses Completed: 100% of lessons marked complete
- Average Progress: Mean completion percentage across all started courses
- Last Activity: Most recent lesson completion or assessment attempt
Reports & Analytics
Accessing Reports
- Go to Presbyters Training → Reports
- Choose a report tab:
- Overview – High-level statistics
- Courses – Course-specific analytics
- Assessments – Quiz and test results
Overview Report
Shows at-a-glance metrics:
- Total courses, lessons, students
- Completion rates
- Enrollment trends over time
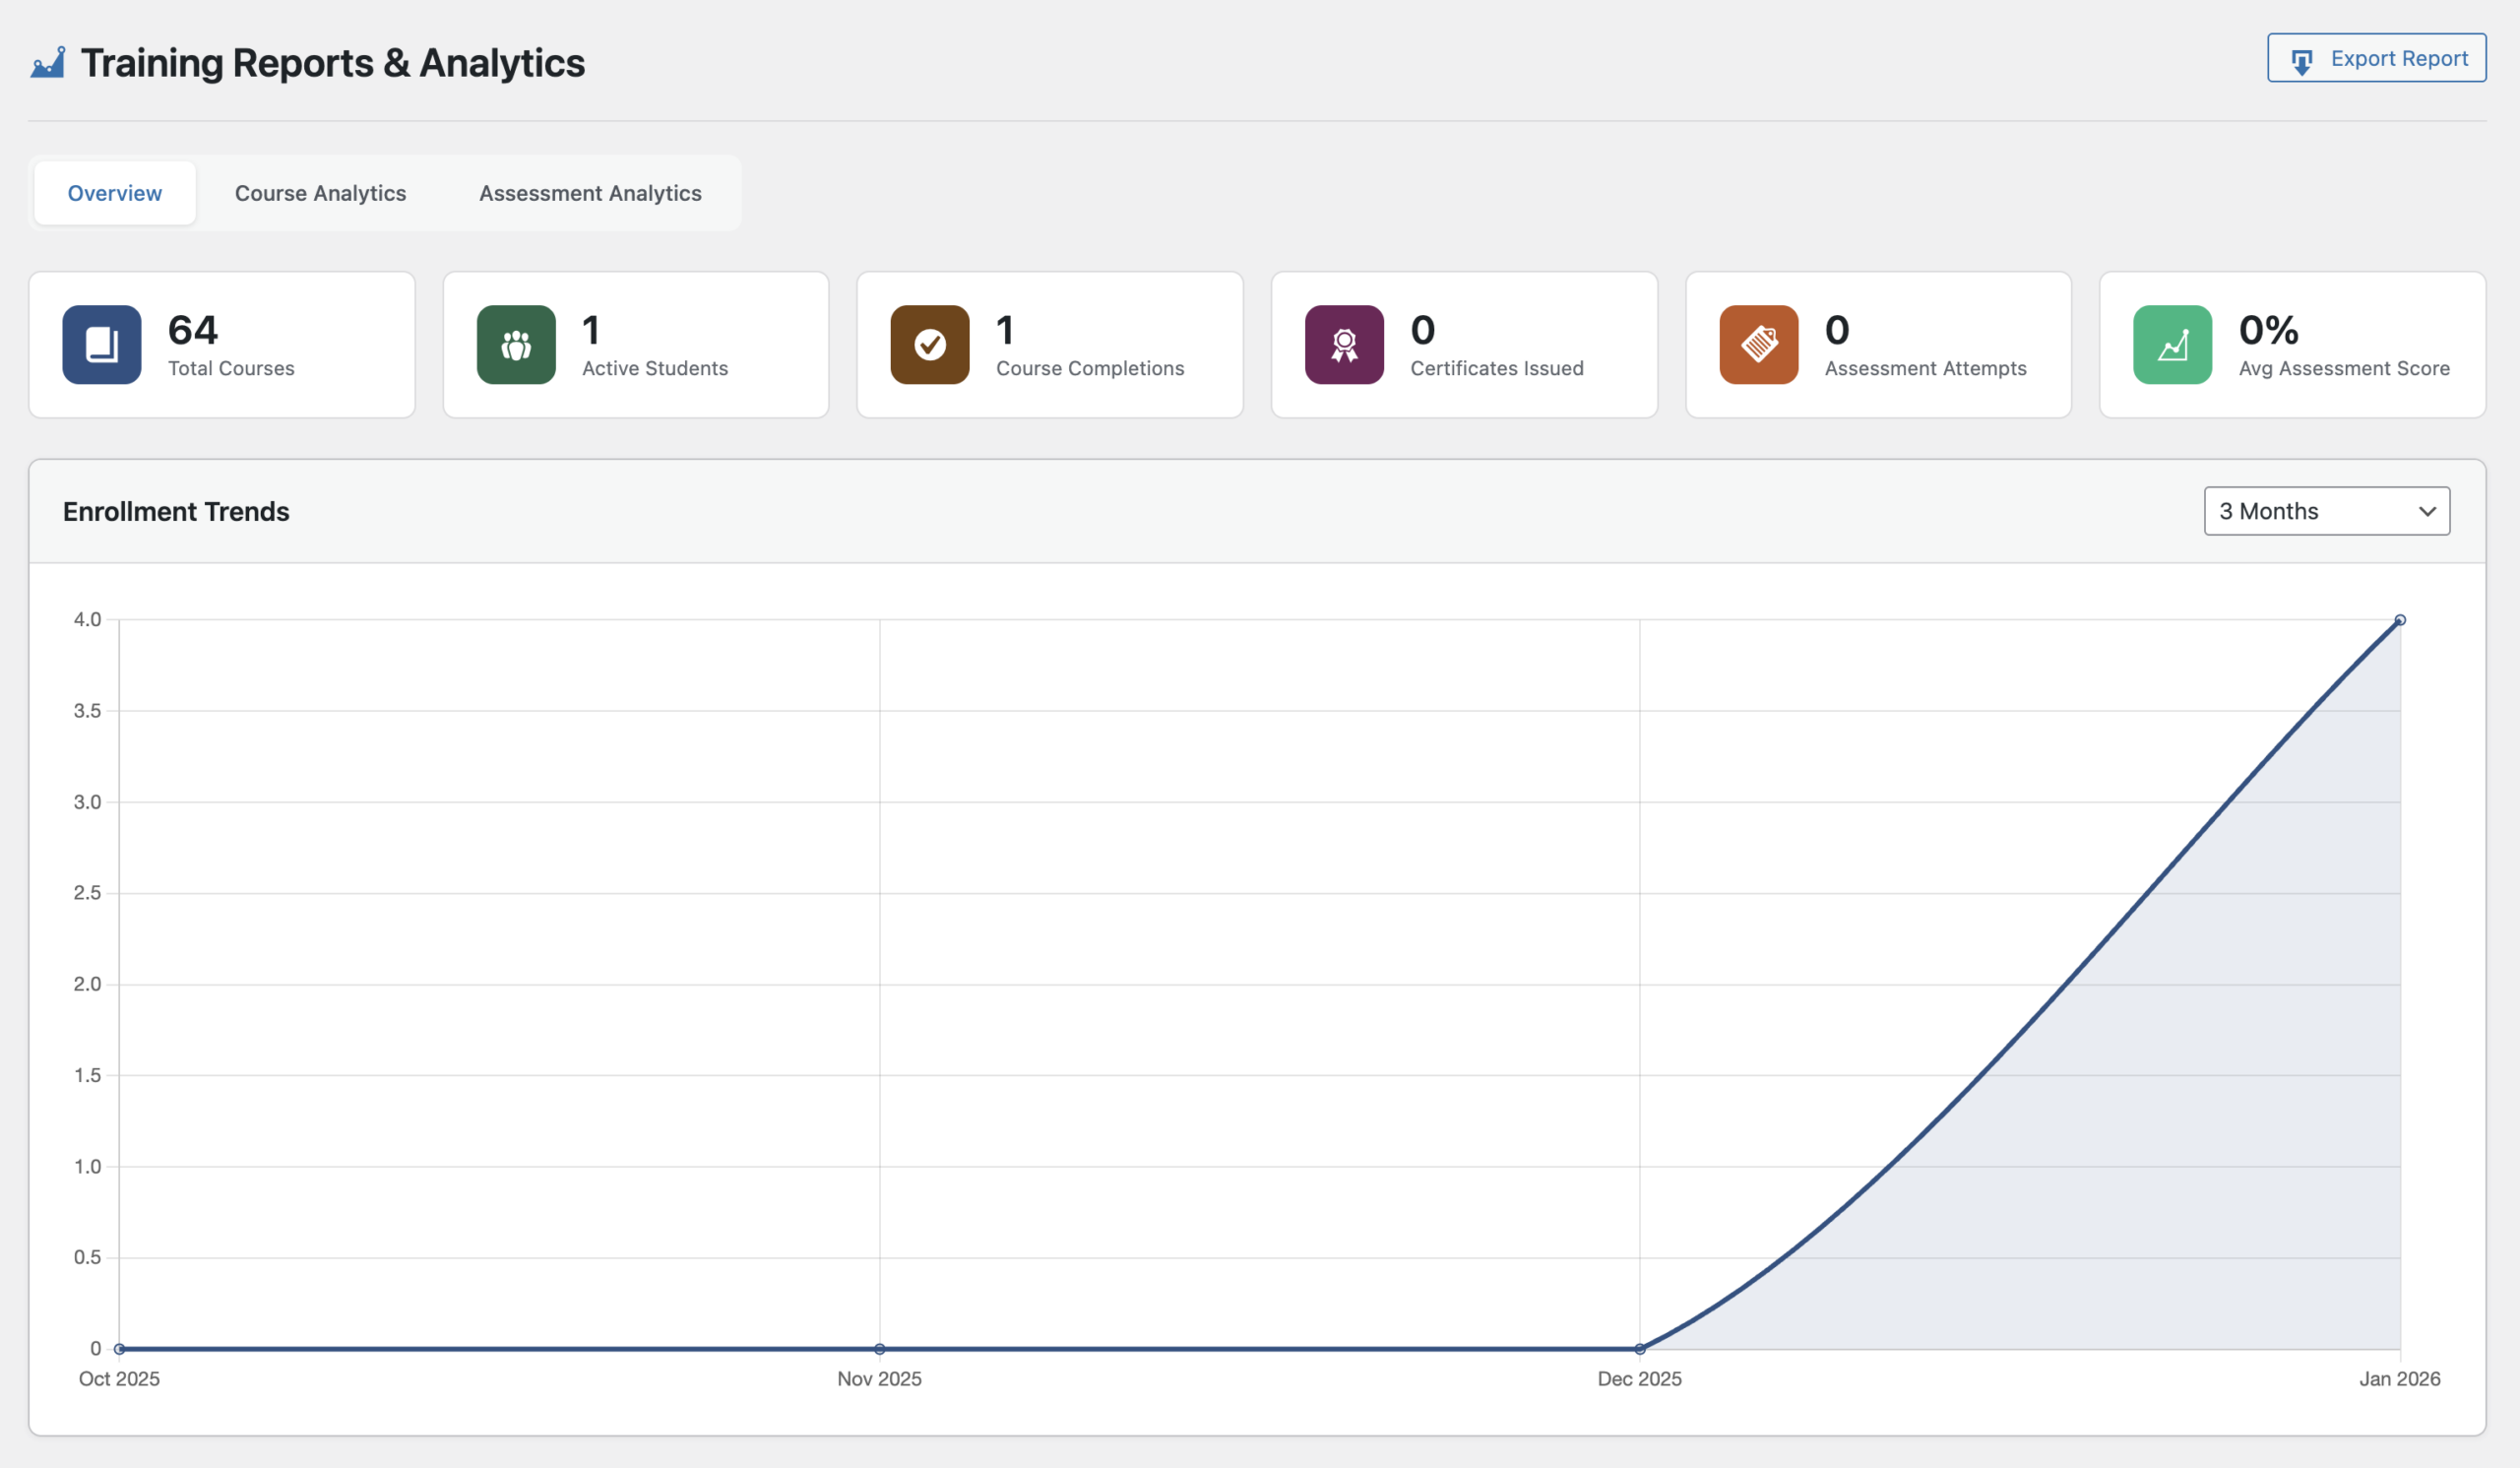
Enrollment Trends
The enrollment chart shows new enrollments over time.
Changing the Time Range:
- Find the time range dropdown
- Select from:
- Last Week
- Last 2 Weeks
- Last Month
- Last 3 Months
- Last 6 Months
- Q1, Q2, Q3, Q4 (quarterly)
- Year to Date

Course Analytics
- Enrollments by course
- Average progress by course
- Completion rates
- Volume distribution pie chart
Assessment Analytics
- Pass/fail rates
- Score distributions
- Lowest performing assessments (may need revision)
Exporting Reports
Click Export Report to download CSV files for:
- Student progress data
- Course enrollment data
- Assessment results
Certificates
How Certificates Work
Students earn certificates when they:
- Complete 100% of a course’s lessons
- Pass the course’s official assessment
Viewing Issued Certificates
- Go to Presbyters Training → Certificates
- See all issued certificates with:
- Student name
- Course name
- Issue date
- Certificate number
- Verification status
Certificate Verification
Each certificate includes:
- Unique certificate number
- QR code for scanning
- Verification URL
Anyone can verify a certificate at your verification page.
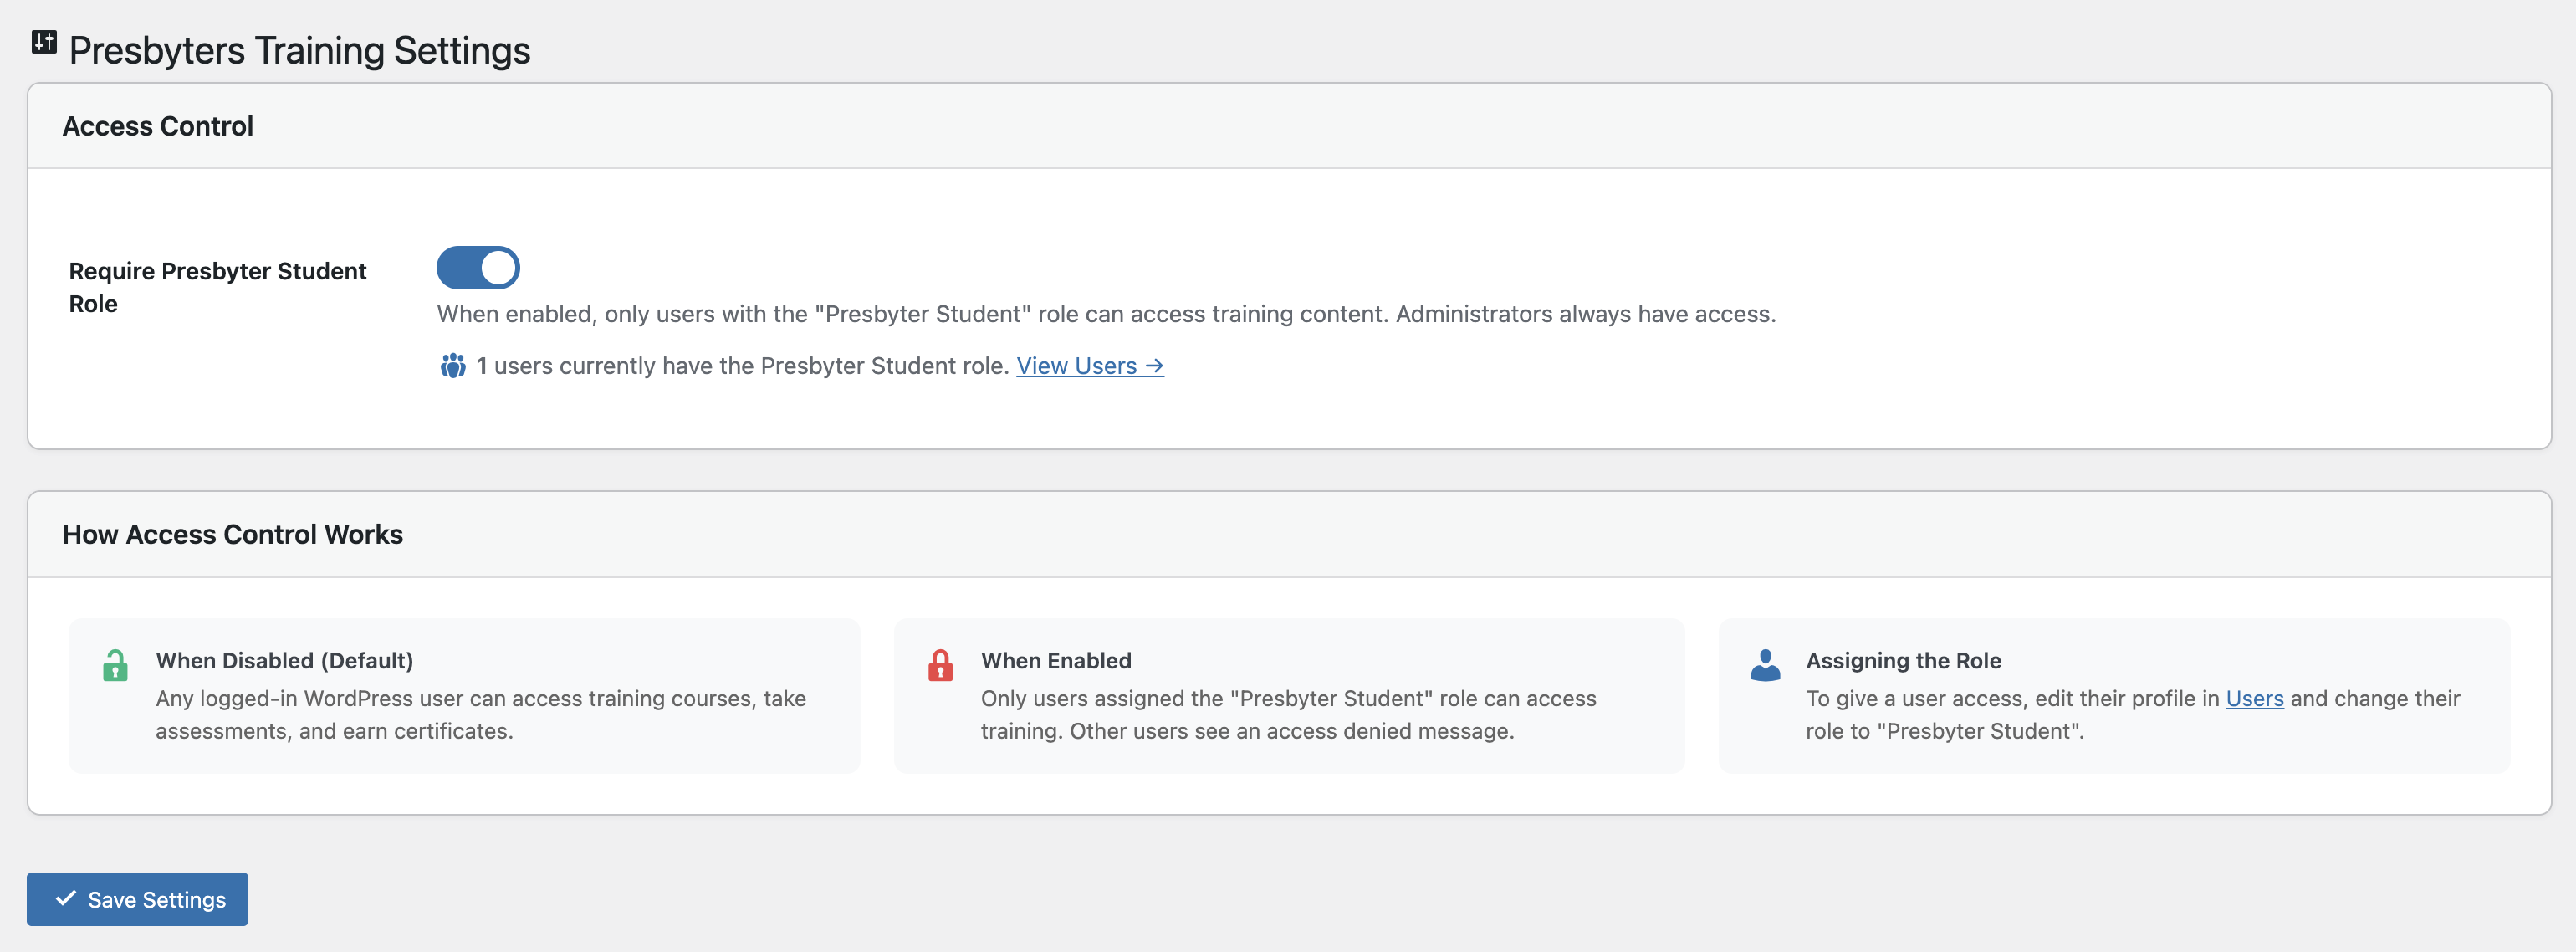
Settings & Configuration
Accessing Settings
Go to Presbyters Training → Settings
Available Options
- Role Restriction: Require Presbyter Student role for access
- Default Passing Score: Set the default percentage for new assessments
- Points Configuration: Adjust points awarded for activities
- Certificate Settings: Customize certificate appearance
- Email Notifications: Enable/disable progress emails
Troubleshooting
Common Issues
Students can’t see courses
- Verify the student has the “Presbyter Student” role
- Check that courses are set to “Published”
- Ensure the Courses page has the
- Clear any caching plugins
Assessment scores are wrong
- Verify the correct answer is properly selected for each question
- Check that questions have the right point values
- Test the assessment yourself
Progress not saving
- Student must be logged in
- Check for JavaScript errors in browser console
- Verify AJAX is not blocked by security plugins
Reports showing no data
- Ensure students have actually started courses
- Check the date range selected
- Verify database tables exist (deactivate/reactivate plugin if needed)
Getting Help
- Check the WordPress debug log at
wp-content/debug.log - Review browser console for JavaScript errors
- Contact your WordPress administrator
Quick Reference
Shortcodes for Pages
| Shortcode | Purpose |
|---|---|
|
Course catalog (main page) |
|
Student dashboard |
|
Certificate verification |
|
Student leaderboard |
|
Badge collection |
For student instructions, see the Student Guide.🔗
Last updated: January 2026 | Version 1.2.0